| Exercise 13 | Create a Workspace to Retrieve Job History Results |
| Data | None |
| Overall Goal | To Create a Workspace that can retrieve the last 1000 jobs and display it in an HTML. |
| Demonstrates | How to use the Get Jobs call in a workspace |
| Workspace | C:\FMEData2018\Resources\RESTAPI\Chapter7Exercise13.Complete |
For this exercise, we are going to create a workspace that retrieves the job history from your FME Server and creates an HTML file with the results. The first workspace we will create retrieves the latest 1000 jobs from the FME Server. Then the results are formatted into a table with the results and beneath this, there will be a chart with the number of results by date.
Use the HTTPCaller to Get Jobs and then Format the Attributes
1) Add a Creator
In a blank FME Workspace add a Creator transformer. It is okay to accept the default parameters.
2) Add the HTTPCaller
Add the HTTPCaller and set the parameters as listed below:
Request URL: http://<yourServerHost>/fmerest/v3/transformations/jobs/completed HTTP Method: GET
Next, fill in the Query String Parameters.
| Name | Value |
| limit | 1000 |
| offset | 0 |
Then, under Headers fill in the Accept Header.
| Name | Value |
| Accept | application/json |

Check the box next to Use Authentication. Then select Basic as the Authentication mode and use the admin/admin username and password. You can also set the Authentication Method to Web Connection and then use the FME Server connection that was created in a previous exercise.

3) Run with Feature Caching
Now, we can save the workspace and then run with Feature Caching. Once, the workspace has run select the magnifying glass on the HTTPCaller. This will open up the FME Data Inspector.

Once the FME Data Inspector is open. Select the response_body. This response_body contains all the job obtained by the API.
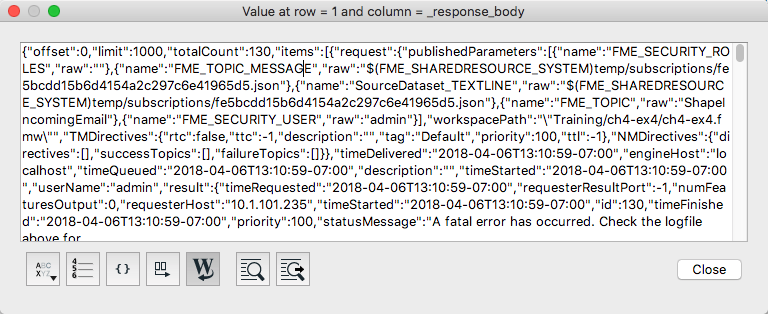
We need to parse the response to get the information we want into attributes we can use. For this exercise, we are going to keep the id, timeSubmitted, and status. We want to find the id, timeSubmitted, and status in the JSON returned from the FME Server.
Close the FME Data Inspector.
4) Add a JSONFragmenter
We are going to use the JSONFragmenter to parse the attributes.

The JSON Attribute is the response body which is produced from the previous call.
JSON queries should start with json and then the category where the attributes are stored. This may take some trial and error at first.
For the JSON Query, we want to find all the responses in the items category therefore, we use this statement json["items"][*]
The code block below demonstrates a sample of the JSON that is returned by the call. By using the JSON Query: json["items"][*], we can then use the Flattening to expose the attributes within the code we would like to use.

Next, we need to set up the Flattening Parameters in the JSONFragmenter.

Here, we enter the attributes we would like to keep from the query. You should keep the id, timeSubmitted, and status.
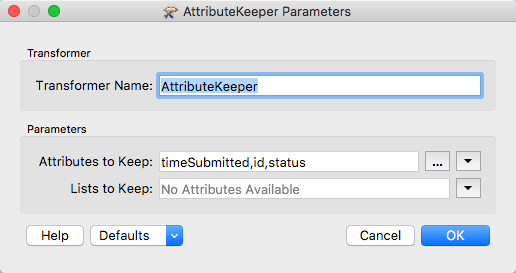
5) Add an Attribute Keeper
Next, add the AttributeKeeper. Attach the AttributeKeeper to the JSONFragmenter. Under parameters and Attributes to Keep: write timeSubmitted, id, status.
Format Dates

6) Add the DateTimeConverter
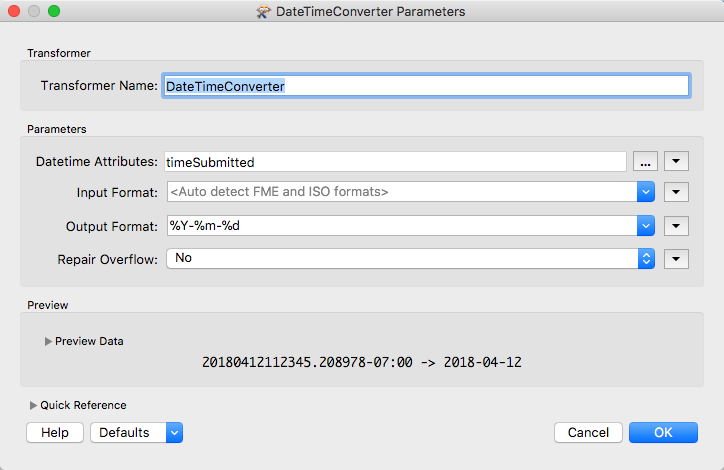
Add a DateTimeConverter and attach it to the AttributeKeeper. Use the DateTimeConverter to format the dates into the %Y-%m-%d format. The datetime format that is returned from the FME Server can be difficult to read. By modifying the Output Format we can make our chart more visually appealing.
The parameters should be filled in as below:
Datetime Attributes: timeSubmitted
Input Format: Auto detect FME and ISO formats
Output Format: %Y-%m-%d
Repair Overflow: No
Create a Table with the Job History Results
If we compiled a table with the result currently, it would create a table. However, it would not have an order so we use the Sorter transformer.
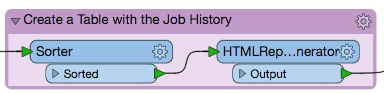
7) Add the Sorter transformer
The Sorter transformer will be connected to the DateTimeConverter. Under the Sort By section list the following parameters:
Attribute: id
Alpha/Num: Numeric
Order: Descending

8) Add the HTMLReportGenerator
Add the HTMLReportGenerator and attach it to the Sorter transformer. In the HTML Report Generator, we can add custom HTML or a table with information gained from the FMEServer.

Under the Page Contents, add Custom HTML to the HTMLReportGenerator.
First, we want to add Custom HTML to specify the header on our HTML file.
<h2><strong>Monthly Server Report</strong></h2>
If you had an introduction or any formatting, you could place it here as well.
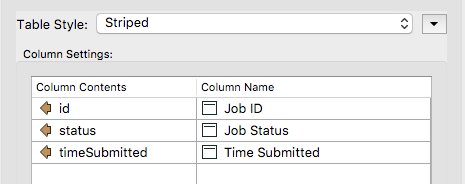
Next, under page contents, add a Table. Specify the column contents and headings the table will use.
| Column Contents | Column Name |
| id | Job ID |
| status | Job Status |
| timeSubmitted | Time Submitted |
To view the table before it is created, click the Preview in Browser button.
Create a Bar Chart with Jobs by Date
9) Add the Aggregator transformer
Add the Aggregator transformer and attach it to the DateTimeConverter.
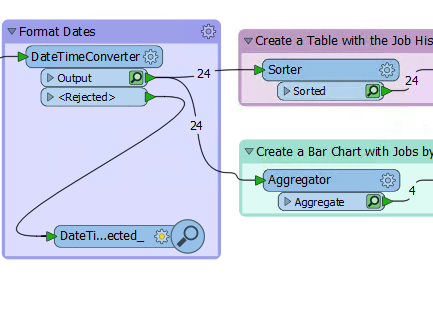
We need to aggregate all jobs by date to create the bar chart so we need the Aggregator.

Here, we are grouping the results by timeSubmitted which is the date the attributes were submitted. Then under Count Attribute, we create a new Attribute named DateCount. Ensure the Accumulation Mode is set to Merge Incoming Attributes
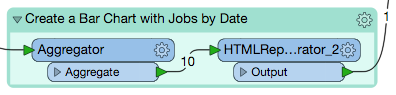
10) Attach the HTMLReportGenerator
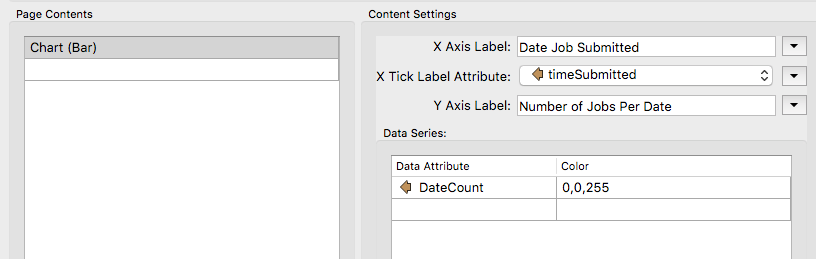
Next, we attach another HTMLReportGenerator. Under Page Contents select Chart (Bar). Then under Content Settings fill in the X and Y labels. The X axis label is Date Job Submitted. The X Tick Label Attribute is timeSubmitted. The Y Axis Label is Number of Jobs per Date. The Data Attribute is DateCount and the Color is 0,0,255. The parameters are set up below:
Format the Layout and Write to HTML
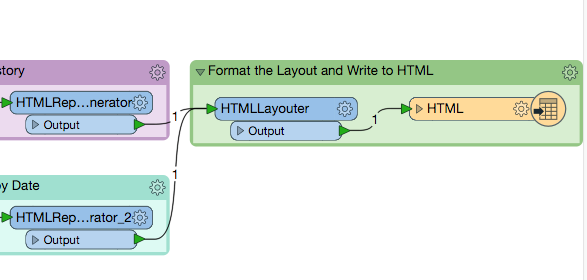
11) Add the HTMLLayouter
Attach both the HTMLReportGenerators to the HTMLLayouter.

12) Add an HTML Writer
Finally, add an HTML Writer. It is okay to accept the default values. Save the file to:
C:\FMEData2018\Output\Training\JobHistory.html
13) View the results!
Run the workspace and view the results.
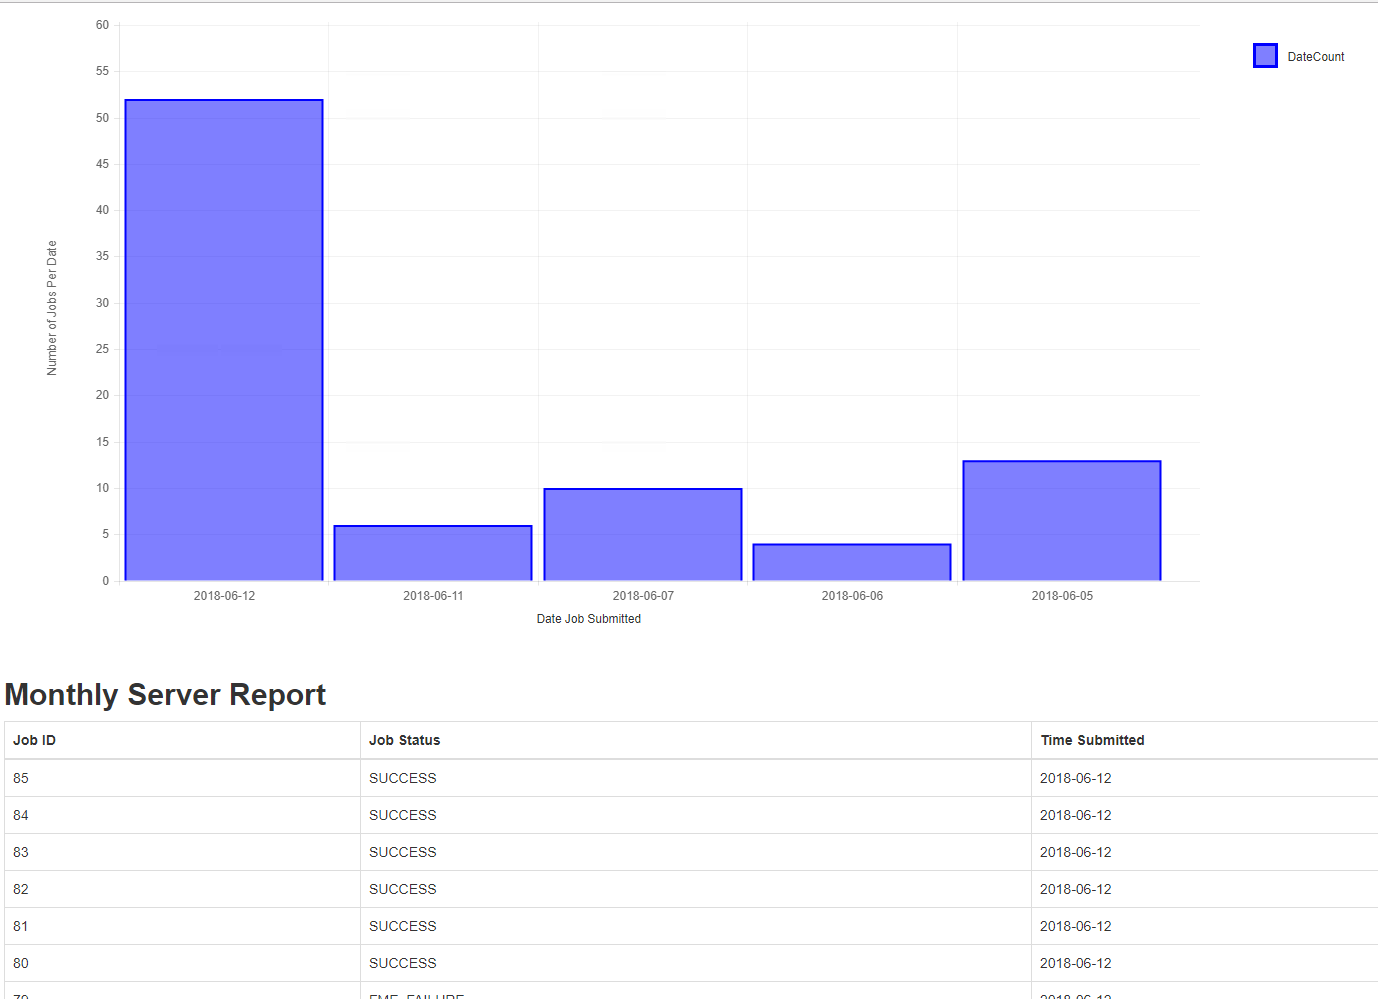
This example demonstrates an FME Server with many completed jobs, if you are using a training computer this graph will be more simplified.
| CONGRATULATIONS |
By completing this exercise you have learned how to:
|