| Exercise 19 | Data Upload and Validation |
| Data | None |
| Overall Goal | To display how to use the FME Server JavaScript API to upload files to the FME Server and run them through a workspace. |
| Demonstrates | How to create a data validation application with a data streaming component. |
| Starting HTML | C:\FMEData2018\Resources\RESTAPI\myFifthApp\myFifthAppBegin.html |
| Completed HTML | C:\FMEData2018\Resources\RESTAPI\myFifthApp\myFifthAppCompleted.html |
| Completed workspaces | C:\FMEData2018\Resources\RESTAPI\myFifthApp\webapp.kml.fmw C:\FMEData2018\Resources\RESTAPI\myFifthApp\webapp.downloadresults.fmw |
This exercise begins from the last exercise and displays how you can modify these exercises to create an application specific to your needs. In this example, you are given a workspace and two tester files to work with and create a data validation app. In the project file we recently uploaded to the FME Server, it included an additional workspace for this exercise. We are now going to customize the web page for data validation.
| WARNING |
| This exercise uses completed workspaces imported from the project folder that was uploaded to the FME Server during Exercise 17. If you did not do this, you may upload the workspaces located in the myFifthApp folder. Then, ensure the guest account has access to the repository. Additionally, please complete Exercise 14 before completing this. |
1) Open the myFifthApp.html file
Go to C:/FMEData2018/Resources/RESTAPI/myFifthApp then right click on myFifthAppBegin.html and select Edit with Notepad++.
2) Review the head section
In the head section (lines 5-15). Here, like the past exercises, there are connections to the FME Server Example CSS and the FME Server JavaScript.
There are additional connections to ArcGIS JavaScript and the CSS file.
3) Review the body section
In the body (line 17-67) of the HTML file there is a brief explanation of what the application does.
In this exercise we are using the previous application as a template and adding functionality to it to meet the needs of a Data Validation application.
Lines 24-36 explain the purpose of the application. A user can upload a file to the FME Server. If the user wants, they can display the results on a map on the page. Or they can download the results and see what sections need to be fixed.
This will allow the user to check their data on the web map. Errors within data will be highlighted in red. The user can then click Download Results to receive a Data Validation report.
After the instructions we need to create buttons to activate the functions in the JavaScript.
Lines 37-42 are from the last exercise and serve the same function. On line 38, there is a button created so users can view the files previously uploaded to the FME Server. This function is called getFiles. Below, the button to getFiles, there is an empty div for the fileList (line 39). This div will be populated with the files uploaded to the server in the current session. After the fileList div, there is an empty form that will list the user parameters in the workspace (line 41). Line 43 contains a button which will activate the streamResults function. This will display the results of the Data Validation on the map on the website. On line 44 there is a button to download the results. Here, the results are returned to the user through a URL. The URL will contain a report on the errors present in the AutoCAD file.
After this, we have a div for the ArcGIS map which will be added to the website (line 53). Then, we have a div where the results of the translation will be displayed (line 57-59)
4) Review the beginning of the JavaScript
This exercise contains many components from previous exercises. However, new components have been added to specialize this application for Data Validation and to add extra functionality.
Line 69, has the same variables as the last application. However, line 71 has additional variables. These are the variables required to stream data to the ArcGIS map. These variables are the map and the layer.
5) Modify the window.onload function
The window.onload function (line 73-106), is similar to the last exercise however, additional code is added for the ArcGIS Maps components. On line 75-78 there are modules imported from the ArcGIS JavaScript, these will allow us to enable a web map.
Lines 81-85 of the initialize the FME Server. In the previous exercise we could use http://localhost for the Server URL. However, now because we are using ArcGIS Maps we need to use our Public IP Address.
To find your Public IP Address, visit What Is My IP. Find your Public IP and add it to the Server section on line 83. Then, on line 84 update the token to your fmetoken.
FMEServer.init(
        {
            server: "http://18.206.217.227", //Update to your IP Address
            token: "725240dd2a68b7010e2e269000825888e5a6bf09" //Update to your fmetoken
        });
Please note the current IP Address and token are not valid. Please update to your own training machine.
Line 87-94 are the same as the previous exercise. The setWorkspace function (line 87) is used to get the variables for the Repository and Workspace. Next, the getSession function (line 91) is used to generate a JSID for the session. The JSID is used keep each data upload unique. The JSID is a randomly generated number. The data will be uploaded to a folder with this number. This prevents users uploading a file with the same name from overwriting previous files. Next, the generateOptions function is used, this function will get the Public Parameters in the workspace and display it for the user.
Next, the map is initialized (lines 96-103).
We now have to specify that we are using the "streets" basemap on line 98. We are centering the map where the AutoCAD file will be centered. If we centered the web map in the wrong location, the data would appear to have never loaded. The zoom should also be set to a value appropriate to the data. If the web map is too far zoomed in, the user may miss important data.
On line 98 set basemap: "streets",
Then on line 99 change center to center: [-97.650, 30.299],
Finally on line 100 set zoom: 14,
The results will look like the JavaScript below.
map = new Map("mapDiv",
      {
          basemap: "streets",
          center: [-97.650, 30.299],
          zoom: 14,
          minZoom: 5,
          smartNavigation: false
      });
6) Modify the setWorkspace function
The setWorkspace function (line 108-113) is different from the setWorkspace function in the previous exercise. In the original, the values of were set by a form where the user could enter the workspace and the repository. However, in this application there is only one workspace and repository that the user is interested in. Therefore, we can hard code the values in. In this function the Public IP address is added as well. This Public IP will be used to create a data streaming link which will stream the data directly to the web map on our page. On line 110 set the repository to "WebApplication"; On line 111 set the workspace to "webapp.kml.fmw"; and finally set the server to your Public IP Address.
function setWorkspace()
{
    repository = "WebApplication";
    workspace = "webapp.kml.fmw";
    server = "http://18.206.217.227"; //Update to your Public IP address
}
7) Review the generateOptions function
The generateOptions function (line 115-121) is the same as the previous exercise. Here, setWorkspace is called to get the repository and the workspace. Then getWorkspaceParameters is used get the published parameters from the workspace. The published parameters are sent to the callback function, buildOptions.
8) Review the buildOptions function
The buildOptions function (line 136-158) is the same as the previous exercise as well. generateFormItems is used to create inputs for the user to fill the published parameters. Then, a loop is used to create the button for the user to upload their data.
9) Review the uploadFile function
The uploadFile function (line 160-166) is the same as the previous exercise, the dataUpload function is used to upload the file to the FME Server. The file is uploaded to a folder named after the JSID. The JSID is a randomly generated number assigned when the getSession function has run.
10) Modify the streamResults function
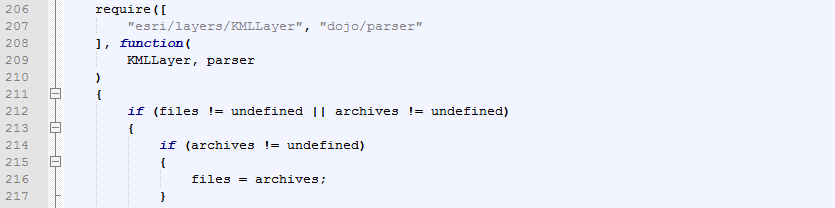
The streamResults function (line 200-230) is new to this exercise. Its purpose is to stream a new layer to the web map. This layer is created in the workspace webapp.kml.fmw.
On line 202, the function begins by checking if there is a layer present already in the web map. If this is the case we would like to remove it. On line 204 the layer is removed if it present.
Insert layer into the if statement it should now read if(layer)
if (layer)
{
    map.removeLayer(layer);
}
Next, the function using the classes the Esri KMLLayer and Parser. The if statements find if there are files are defined or if the archives are defined. If archives are defined then the archives are assigned to the files variable.
After, this a data streaming link is created. This is using the server, repository, workspace, jsid, and filename variables.
On line 220 replace //jsid variable with jsid
resultUrl = server + '/fmedatastreaming/' + repository + '/' + workspace + '?SourceDataset_ACAD=%24(FME_SHAREDRESOURCE_SYSTEM)%2Ftemp%2Fupload%2F' + repository + '%2F' + workspace + '%2F' + jsid + '%2F' + filename;
This workspace has one public parameter, this is the where the file is stored. The full path where the file is stored will be in the temporary upload folder. Inside the upload folder, there is another folder called repository, then workspace, then jsid. Inside all of these folders there will be the file the user uploaded. The resultUrl will be a functioning data streaming link we need to incorporate into the new Esri layer.
On lines 224-226 a new layer is created using the resultURL created on line 220.

11) Review the downloadWorkspace function
The downloadWorkspace function (line 232-254), is very similar to the streamWorkspace function. It is different because it no longer has the Esri components required for streaming the KMLLayer directly to the map. Here the user, will receive a link they can click to open up a page with an HTML Report.
Lines 246-248 have been added to append the finalResults section to include the directURL.
12) Modify the newSession function
The newSession function (line 275-306) is used to create a new session for the user. Without this function, the user could upload one file, check if it is valid and get the validation report. However, if they tried to upload a new file, it would upload to the same folder in the FME Server. If a user wanted to check multiple files, FME Server would not know which one to select if they were stored in the same folder. This is why the newSession function is used. It essentially repeats the same steps in the beginning of the web application.
The first function that should be used is getSession.
To do this on line 277 replace:
FMEServer.//Function to create the new session (repository, workspace, setVars);
With:
FMEServer.getSession(repository, workspace, setVars);
After, we have created a newSession we need to refresh the file list so the user will not see the files.
To do this on line 278 replace:
FMEServer.//Function to get the new files(repository, workspace, jsid, processFiles);
With:
FMEServer.getDataUploads(repository, workspace, jsid, processFiles);
We have also included the processFiles function to process refresh the current fileList.
Once the user selects the newSession function the fileList should be empty and they should receive a new JSID.
13) Test Out the Application
Go to http://localhost:8000/myFifthApp/myFifthApp.html
Once on the webpage select Choose File. Then navigate to C:\FMEData2018\Resources\RESTAPI\myFifthApp\Data\bad_data and select the file. Then select upload file.
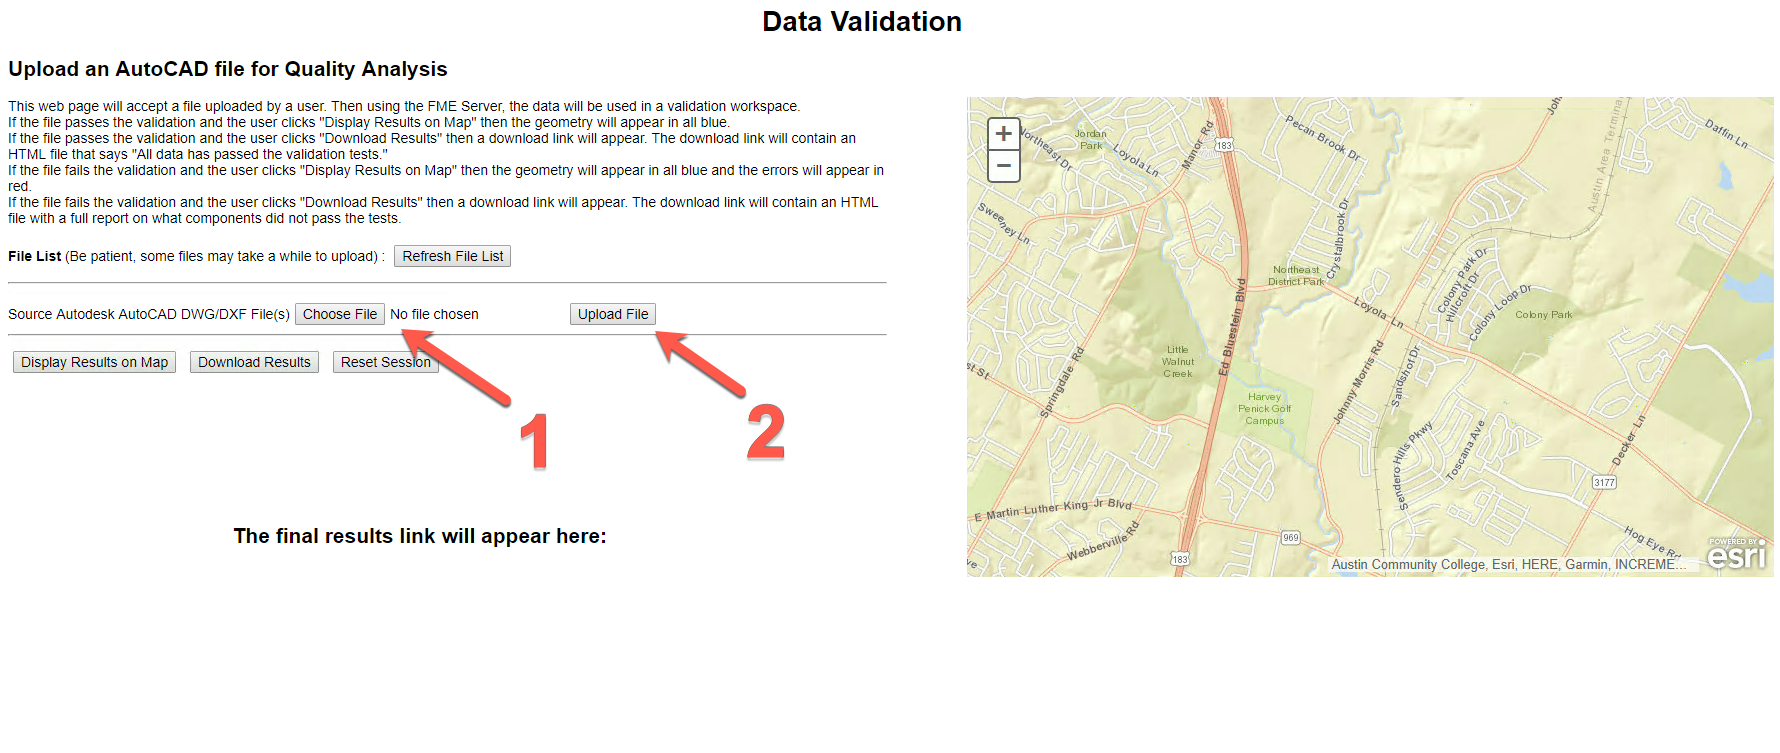
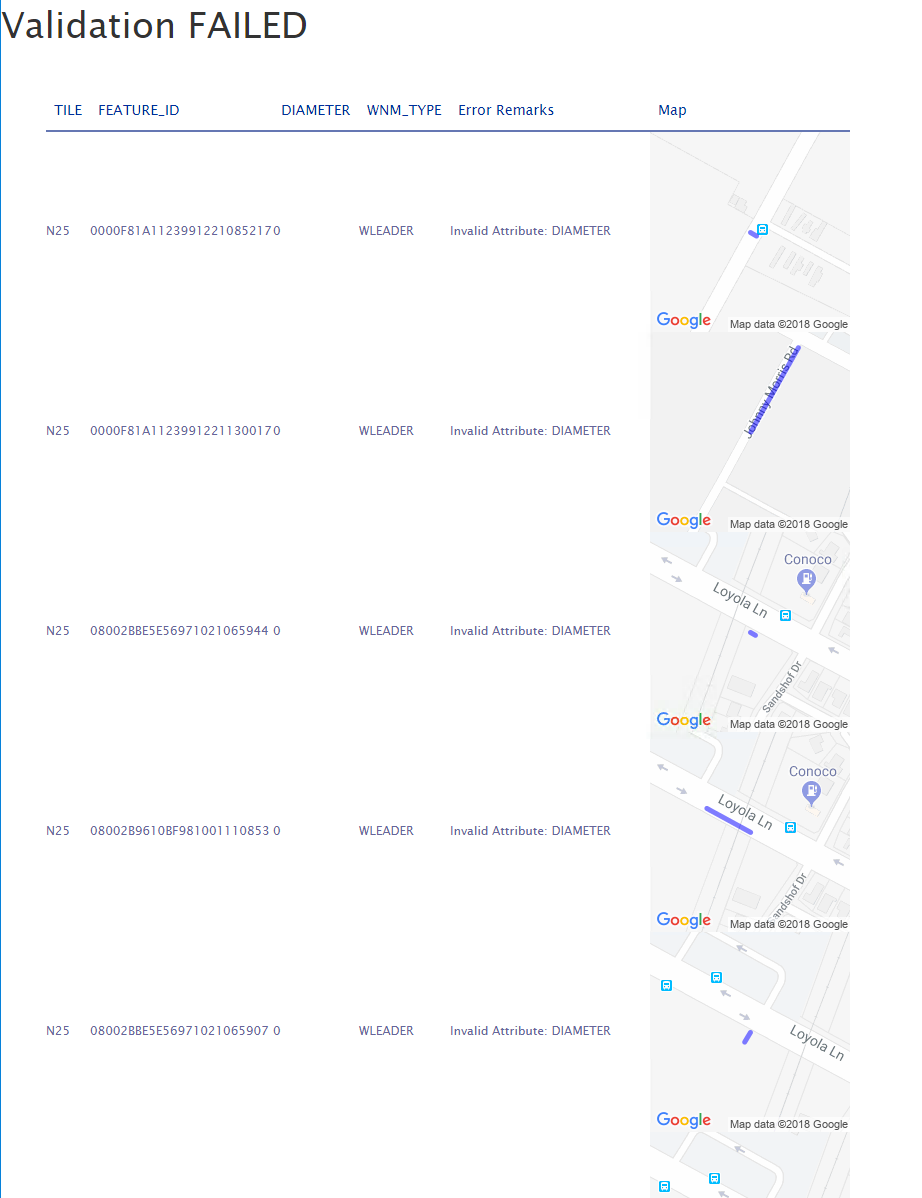
After, the file has been uploaded to the FME Server, select Display Results on Map. The errors in the AutoCAD file are displayed in red. Then, select Download Results.
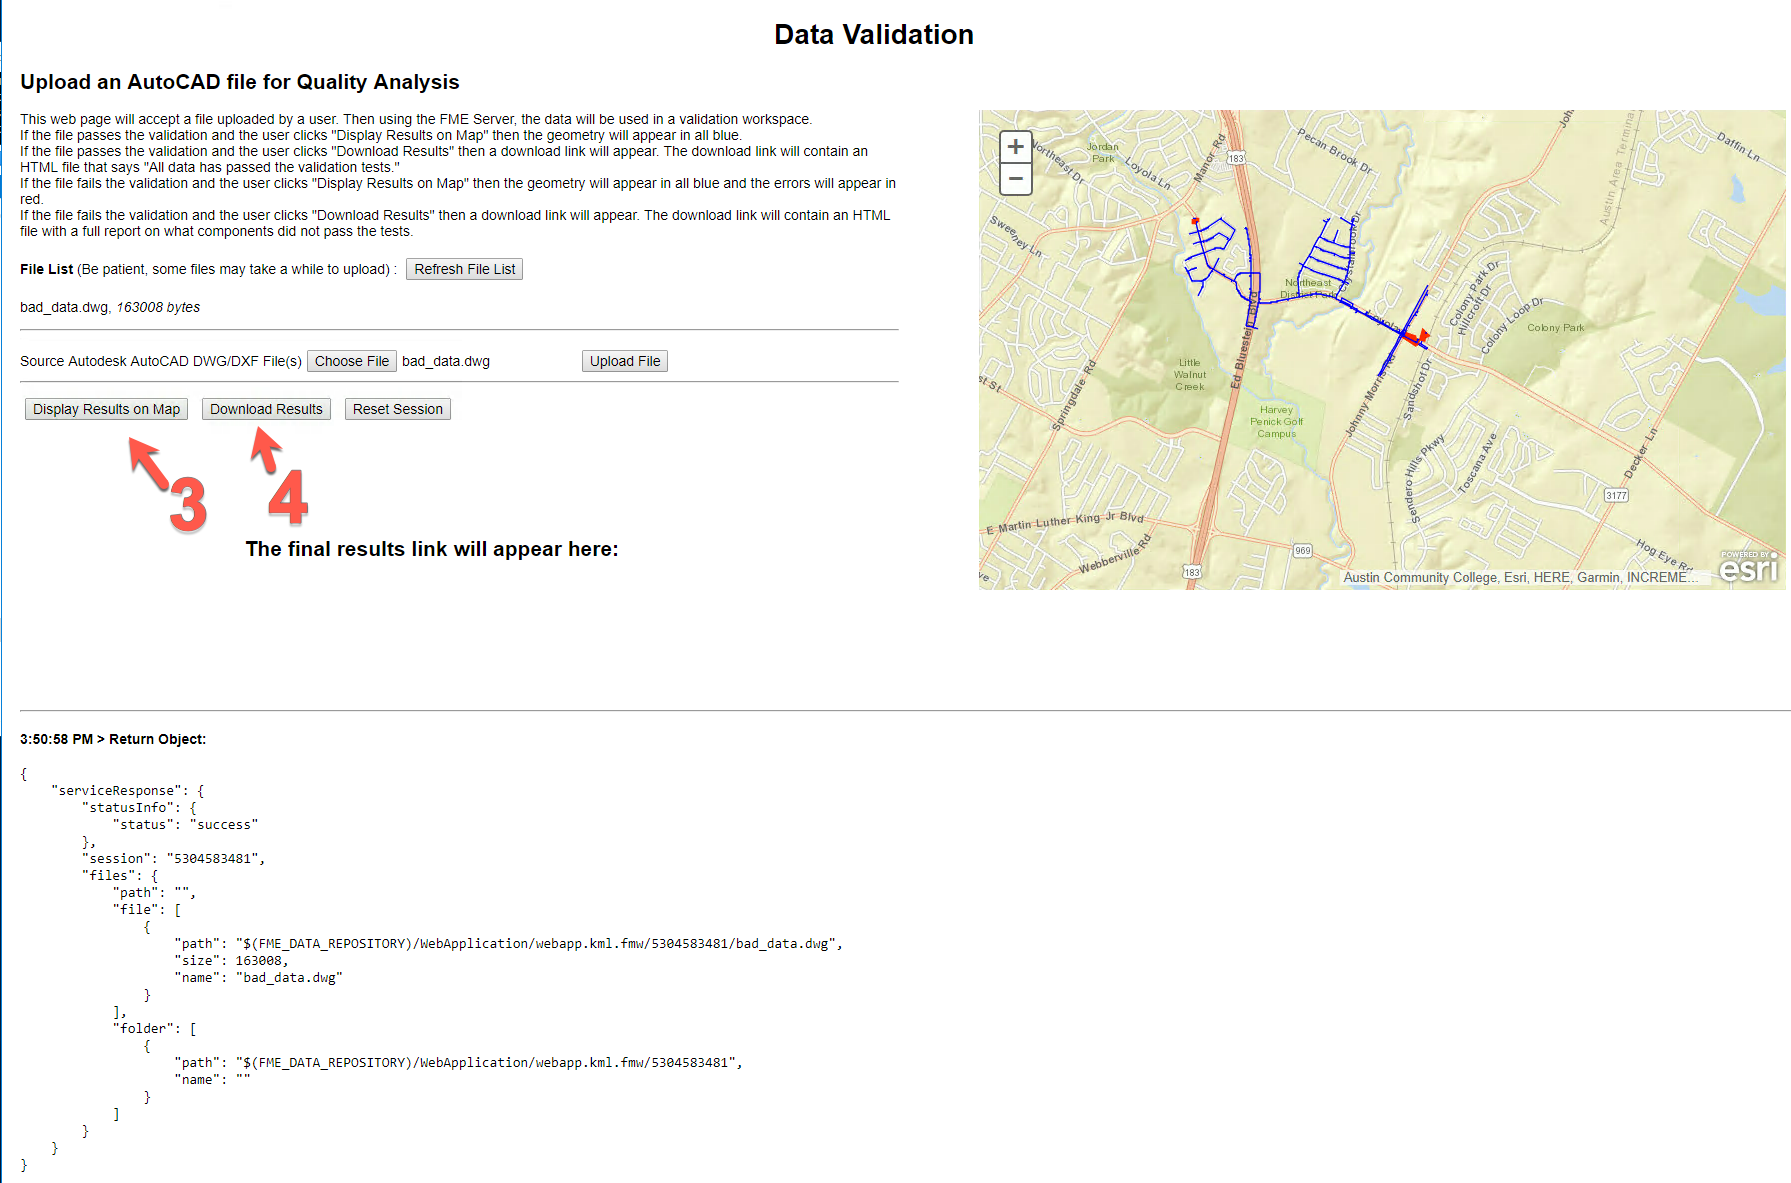
The Download Results button will return and HTML page with the following format.
| CONGRATULATIONS |
By completing this exercise you have learned how to:
|