| Exercise 2 | Changing the FME Server Database Provider |
| Data | C:\FMEData2017\Resources\ServerAdmin\pg_hba.conf |
| Overall Goal | Change the database provider for FME Server |
| Demonstrates | Configuring a new PostgreSQL database |
Your company has an Express Installation of FME Server already installed but your Database Administrator has just informed you that you that the company will be switching its database providers from the default FME Database to a PostgreSQL database to allow for more control over database security.
| Miss Vector says... |
| If you have completed the Configuring for HTTPS exercise, remember that the URL to connect to FME Server is now https://localhost:8443/fmeserver and NOT http://localhost/fmeserver! |
1) Backup FME Server
Backing up your current FME Server instance is an important step before performing any post-installation configurations. Once you have changed the database provider, you can restore FME Server configurations all at once instead of having to go through the process of manually changing any settings, republishing workspaces, etc.
Note: If you have already created an FME Server backup you can use this existing .fsconfig file and continue to Step 2.
Open the FME Server web interface, either through the Web Interface option on the Windows Start Menu or directly in your web browser, and log in using the username and password admin.
Find Backup & Restore in left sidebar, under the Admin heading in the FME Server web interface, and click to open this page.
Select Download to save a backup file of FME Server - this can be thought of as a "snapshot". It will take a short time to run processes in the background to compile the FME Server backup, and once this is complete it will automatically save to your local downloads folder.
2) Initial Database Configuration
For the purposes of this exercise a separate PostgreSQL database has been installed to the Training Machines, running on port 5432.
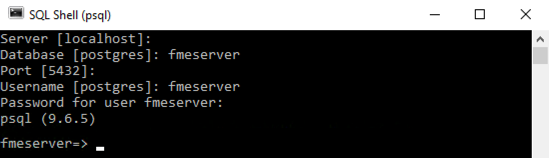
The next step is to configure this database for FME Server. From the Windows Start Menu, select PostgreSQL > SQL Shell to open the psql command prompt. Login using the username and password postgres - this is the root user for the database.
First, create a new user to assign ownership of the FME Server database. From the psql prompt, run the postgresql_createUser.sql script by entering the following command:
\i 'C:/apps/FMEServer/Server/database/postgresql/postgresql_createUser.sql'
This SQL script creates a new user fmeserver with password fmeserver.
Next, create the FME Server database by running the postgresql_createDB.sql script in the psql command prompt:
\i 'C:/apps/FMEServer/Server/database/postgresql/postgresql_createDB.sql'
This SQL script creates the FME Server database and grants all privileges on the database to the user fmeserver.
3) Create the FME Server Database Schema
Exit the psql command prompt to end the current session. Open a new session (Windows Start Menu > PostgreSQL > SQL Shell) and now login to the database fmeserver as the FME Server database user - using the username and password fmeserver.
From the command prompt, run the postgresql_createSchema.sql script by entering the following command:
\i 'C:/apps/FMEServer/Server/database/postgresql/postgresql_createSchema.sql'
This SQL script creates all FME Server related tables, indexes, views, and triggers.
4) (PostgreSQL Only) Allow Connections
Navigate to C:\Program Files\PostgreSQL\9.6\data\pg_hba.conf and open this file in a text editor in administrator mode.
Change the following lines:
host    all        all        127.0.0.1/32    md5
host    all        all        ::1/128        md5
to:
host    all        all     0.0.0.0/0    md5
host    all        all        ::/0    md5
Save and close the pg_hba.conf file.
In order for these changes to take effect, restart the PostgreSQL Database service. Open the Services application by using the Windows Start Menu and typing in Services. In the Services application, right-click postgresql-x64-9.6 and select Restart.
5) Configure the Database Connection
Open the fmeCommonConfig.txt file, located in the C:\apps\FMEServer\Server\ directory, using a text editor in administrator mode.
Under the heading FME SERVER SETTINGS START, locate the section titled Database Connection and update the DB_JDBC_URL parameter for the PostgreSQL database:
DB_JDBC_URL=jdbc:postgresql://localhost:5432/fmeserver
Save and close the fmeCommonConfig.txt file, and then Restart FME Server.
6) Post-Configuration Script
Finally, open C:\apps\FMEServer\Utilities\, and invoke runPostInstall.bat by right-clicking the file and selecting Run as administrator.
This script will take a couple of minutes to create the default FME Server Publisher and Subscriber protocols, add FME Server cleanup tasks, and add the "Samples" repository.
7) Restore Your FME Server Configuration
Since a backup of FME Server was created in Step 1, we can now restore that same FME Server instance which contains all of the previous FME Server configuration settings.
Login to the FME Server web interface and select Backup & Restore > Restore from the left sidebar.
Upload your saved backup configuration file from the beginning of this exercise. Navigate to C:\Users\Administrator\Downloads\ and locate the FME Server backup file (Hint: It has .fsconfig extension!). Drag-and-drop this file onto the FME Server Restore page:
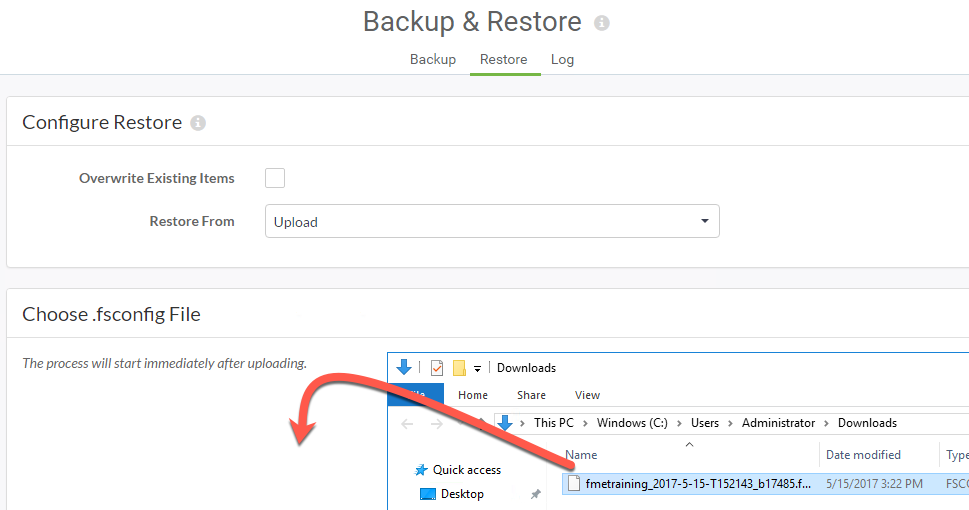
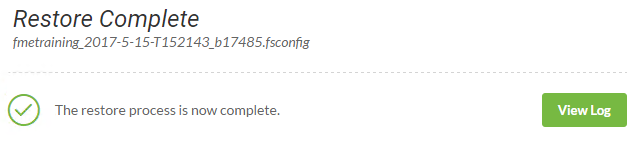
The FME Server web interface will report if the restore is successful. If it is not, the log file is easily accessible from this page if further investigation is needed.
| CONGRATULATIONS! |
By completing this exercise you have learned how to:
|