| Exercise 2.4 | Schema Editing and Mapping |
| Data | 3-1-1 case location details (XLS hosted on FTP) |
| Overall Goal | Edit attribute names and remove attributes |
| Demonstrates | Schema editing and schema mapping |
| Start Workspace | C:\FMEData2018\Workspaces\IntroToDesktop\Ex2.4-Begin.fmw |
| End Workspace | C:\FMEData2018\Workspaces\IntroToDesktop\Ex2.4-Complete.fmw |
Now that you created a workspace to translate the 3-1-1 data to CSV, the 3-1-1 department has requested that you remove the underscores from the attribute names and add a Date attribute. We can use a transformer to make these changes to the schema.
1) Start Workbench
Start Workbench (if necessary) and open the workspace from Exercise 1. Alternatively you can open C:\FMEData2018\Workspaces\IntroToDesktop\Ex2.3-Begin.fmw.
2) Rename Feature Type
Currently, the destination schema matches the source. However, the end user of the data has requested changes to the schema.
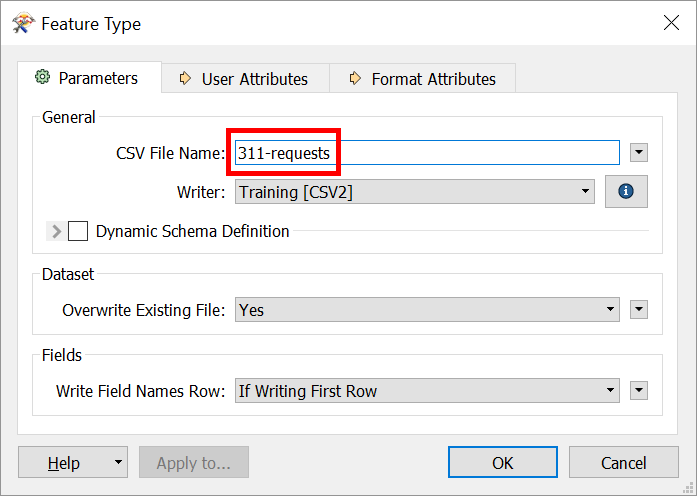
Inspect the writer feature type parameters by double-clicking it or clicking its cogwheel. Click in the field labelled CSV File Name and change the name from "CA18COV1 - Service Request Loca" to "311-requests":
Now when the workspace runs, the output will be named 311-requests.csv.
3) Update Attributes
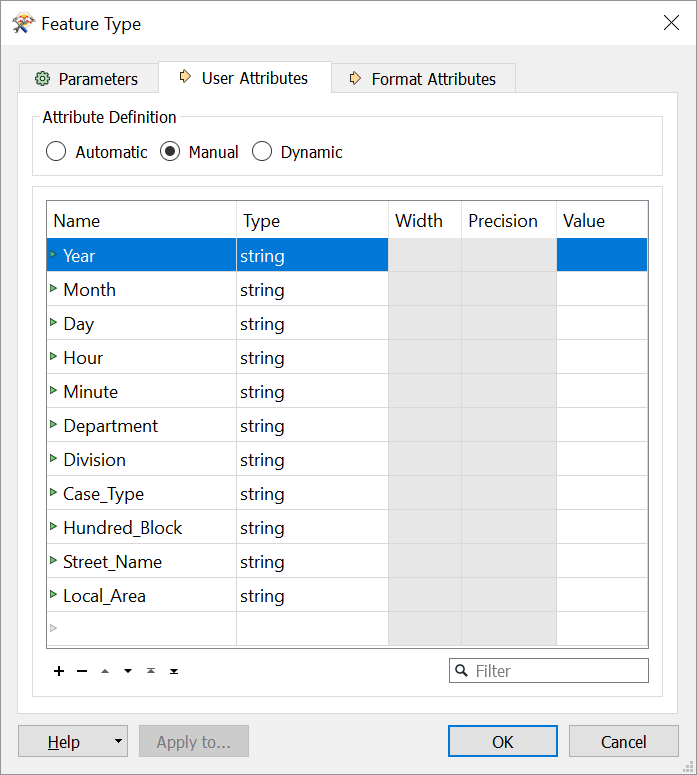
Inspect the user attributes by clicking on the User Attributes tab. They will look like this:
Let's get rid of those underscores in the attribute names and add a new attribute, called Date, that we will supply values to later. Carry out the following actions:
| Name | Action |
|---|---|
Case_Type |
Rename attribute to Case Type |
Hundred_Block |
Rename attribute to Hundred Block |
Street_Name |
Rename attribute to Street Name |
Local_Area |
Rename attribute to Local Area |
Date |
Create attribute Date of Type string |
You can rename attributes by clicking in the Name cell and making your edit. You can add an attribute by clicking in the blank Name cell at the bottom of the table and entering a new attribute name. Alternatively, you can use the + button to add a new row. You can give it the Type string by clicking the drop-down menu under Type and selecting string.
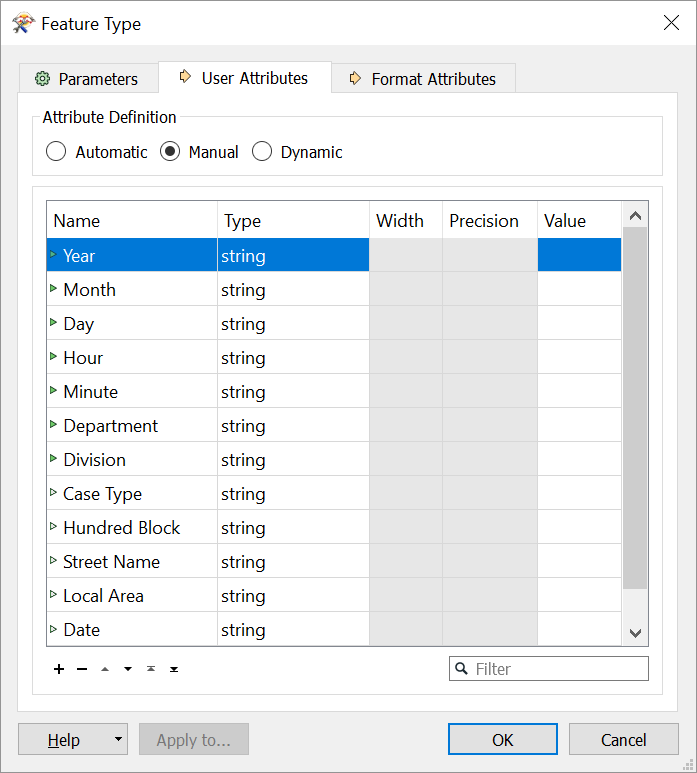
Once you have made these changes to the writer schema, the attribute list should now look like this:
Now click OK.
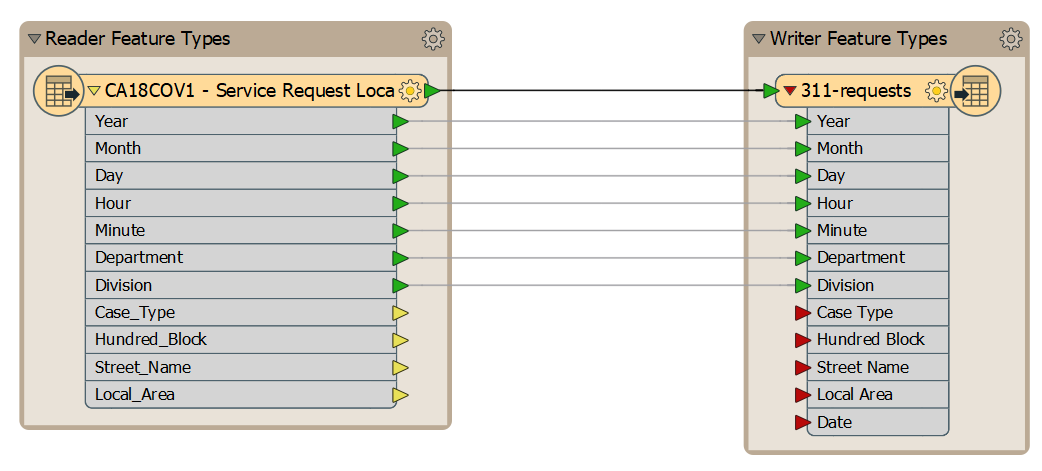
You might notice that the triangles next to the attribute names we edited and created on the writer feature type have changed color to red! We call these triangles ports. When they are on the left side of an object, they are called input ports, while triangles on the right side are called output ports. You can notice the attributes we edited have changed color to yellow.
| TIP |
Colored ports are used to aid schema mapping visually:
|
4) Save the Workspace
Save the workspace. It should now look like this:
5) Add a Transformer for Schema Mapping
Let's use a transformer to map our old schema onto our new one. Transformers are objects we add to the canvas to modify our data during the translation. We can use the AttributeManager.
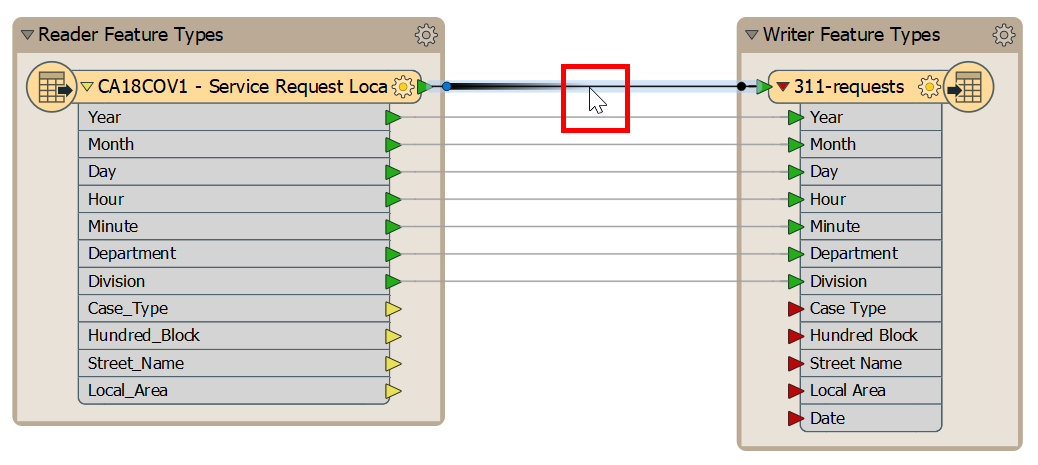
To add a transformer, click on the feature connection (dark black line) from reader to writer feature type:
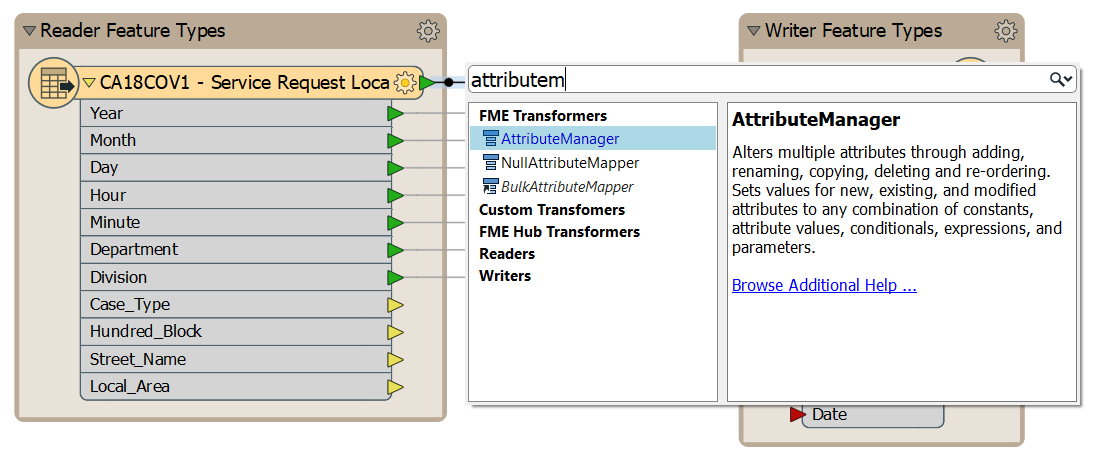
Start to type the phrase "AttributeManager." As you type, FME searches for a matching transformer, a feature called Quick Add. When the list is short enough for you to see the AttributeManager, select it from the dialog (double-click on it, or hit Enter):
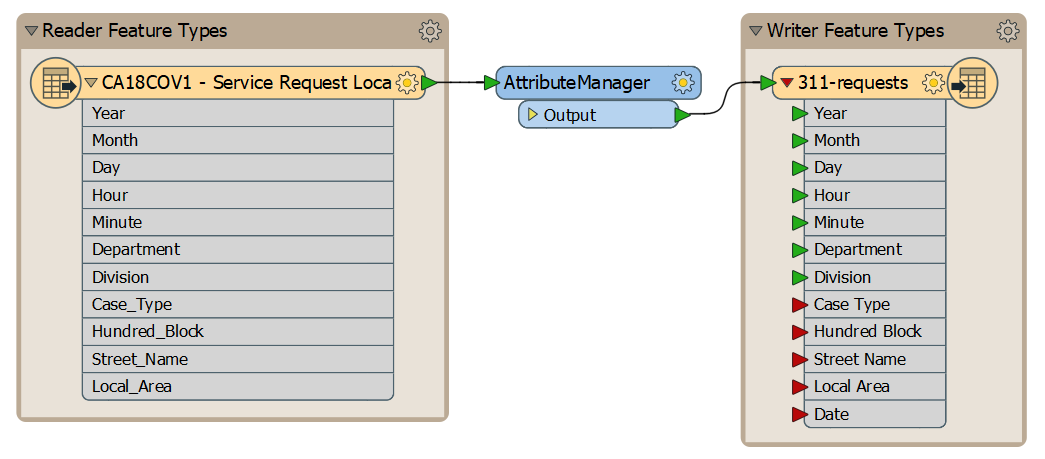
Doing so will place an AttributeManager transformer:
| TIP |
| For a great tip on adding transformers, see #5 in our list of The Top Ten FME Tips of All Time! |
6) Set Parameters
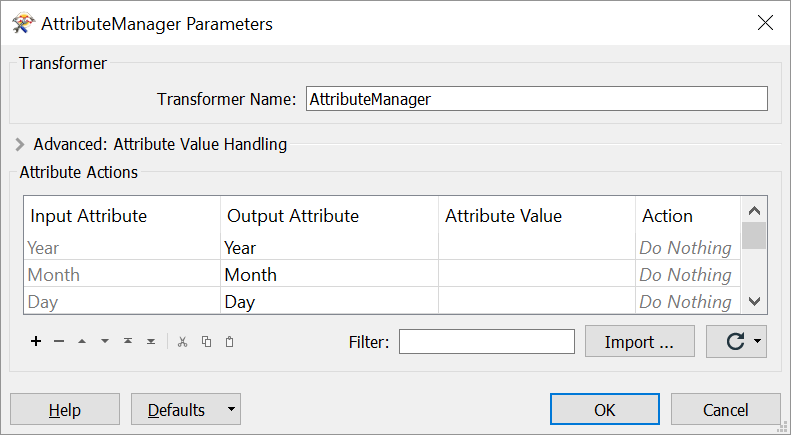
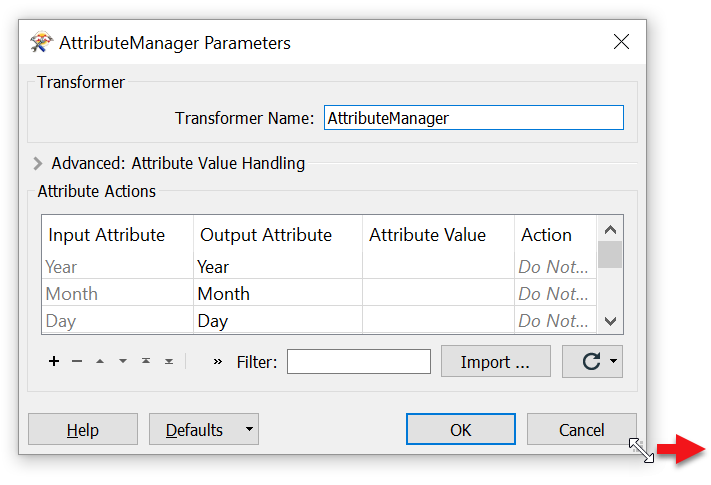
View the AttributeManager parameters by double-clicking it. It will look like this:
You might have to resize your AttributeManager dialog to see all four columns. You can resize dialogs by hoving over the bottom right corner until you see an expander cursor, and then clicking and dragging:
Notice that all of the attributes on the stream in which it is connected automatically appear in the dialog.
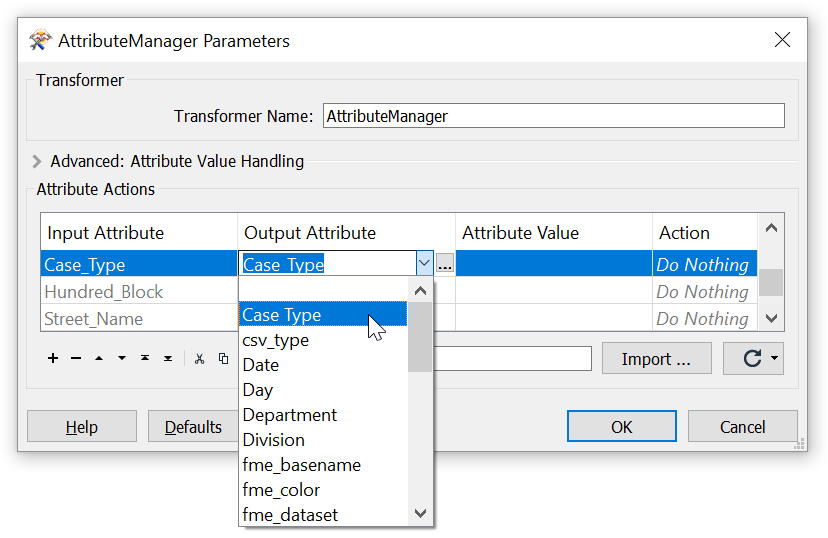
Where the Input Attribute field is Case_Type, click in the Output Attribute field. Click on the button for the drop-down list and in there choose Case Type as the new attribute name to use:
In response, the Action field will change to read Rename.
| TIP |
| `Case Type` appears in the list because it already exists on the writer feature type. If we had done this step before editing the writer schema, we would have had to enter the new attribute name in this dialog manually. Note that this feature (looking ahead to the attributes on the writer feature type) is only needed in some related transformers, e.g. AttributeRenamer and AttributeCopier. Normally drop-down attribute lists contain just the attributes on incoming features. |
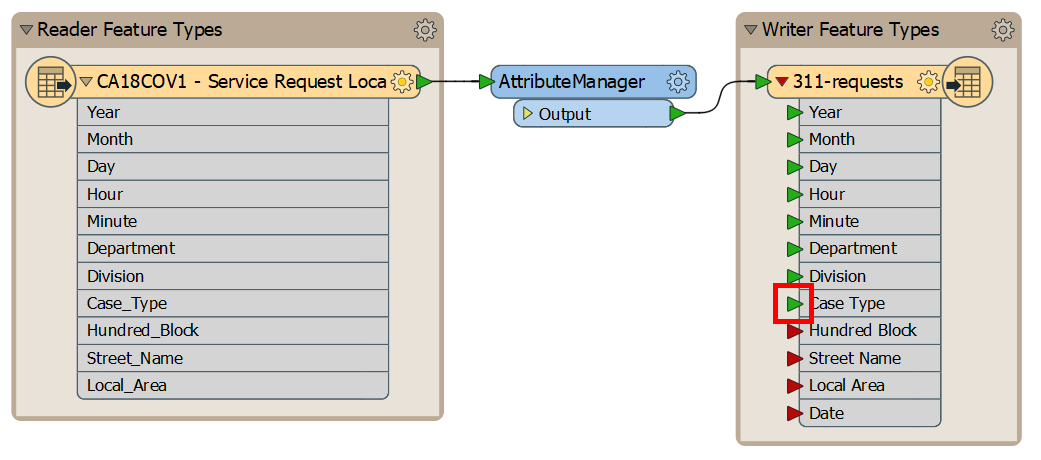
Click OK to close the dialog. Now in the Workbench canvas window, you will see the Case Type attribute is flagged with a green arrow, to confirm that the attribute has a value.
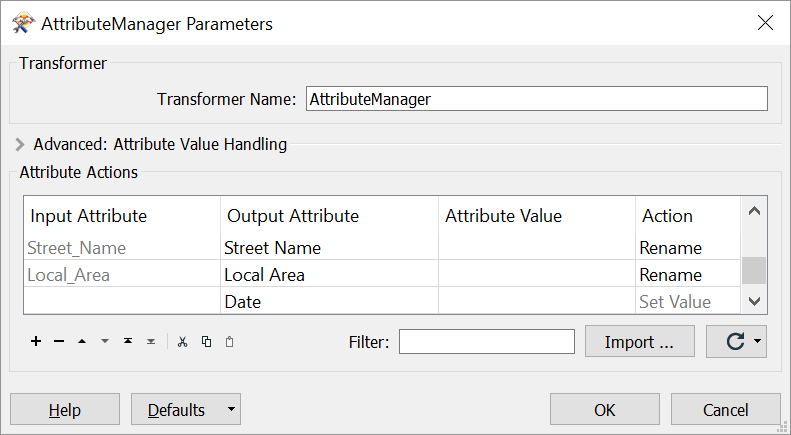
Reopen the AttributeManager dialog and repeat this step for the remaining attributes with underscores.
8) Create a Date Attribute
We also want to add a new attribute, Date. We could use several different transformers to accomplish this; again, there are often many solutions to a problem in FME. For example, we could use the ExpressionEvaluator or StringConcatenator. In this case, let's keep our workspace efficient by creating the attribute within the AttributeManager.
Go to the bottom of the Attribute Actions table and notice the last row is empty except for the text <Add new Attribute>. Click this text and type in Date. You might see it appears as an option in the drop-down menu; FME will look ahead to your writer schema to help you find attributes. After you type in or select Date, the Action cell changes to Set Value:
After clicking OK, you should see the input ports on the writer feature type all turn green. Note that we do not have a Date attribute in our source data; therefore, we will not be mapping that attribute yet and its port will remain red.
9) Run Workspace and Inspect the Output
Save the workspace.
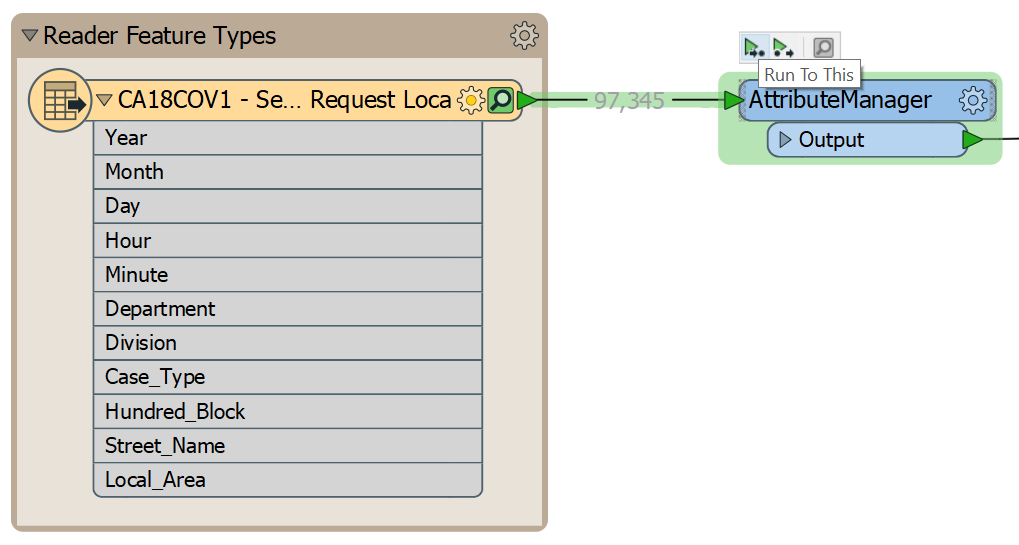
Then, let's use the feature caching and partial runs. Click on the AttributeManager to select it, and then click Run To This:
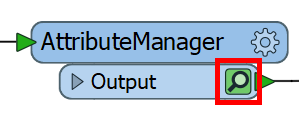
Once the cache updates, click the green icon on AttributeManager to inspect the changes to your schema.
Looking at the Table View, we can see our schema has been edited to remove the underscores from attribute names and to add a Date attribute (which is empty for now):
| CONGRATULATIONS |
By completing this exercise, you have learned how to:
|
