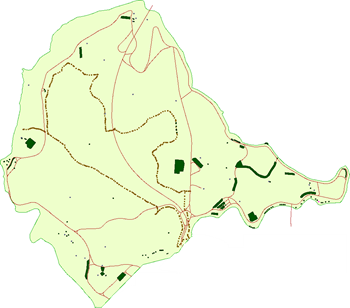
| Exercise 1 | Creating a Workspace |
| Data | City Parks (MapInfo TAB) |
| Overall Goal | Create a set of data for mapping a recreational event |
| Demonstrates | Workspace component and parameters |
| Start Workspace | None |
| End Workspace | C:\FMEData2017\Workspaces\DesktopBasic\Components-Ex1-Complete.fmw |
The city is hosting a fundraising walk for a major charity. There will be many thousands of people taking part and good organization of the event is vital. One of the requirements is a map for participants and you have been tasked with using FME to put together the data that will form the map.
The data required for this project (and the format it is held in) includes:
| Dataset | Format | Location |
|---|---|---|
| Park outline | MapInfo TAB | C:\FMEData2017\Data\Parks\Parks.tab |
| Trail Route | Comma Separated (CSV) | C:\FMEData2017\Data\GPS\WalkingTrail.csv |
| Food vendors | Esri File Geodatabase | C:\FMEData2017\Data\CommunityMapping\CommunityMap.gdb |
| Parking facilities | OpenStreetMap | C:\FMEData2017\Data\OpenStreetMap\amenity.osm |
| Roads into/out of park | OpenStreetMap | C:\FMEData2017\Data\OpenStreetMap\highway.osm |
The outputs required are Google KML and GPX. So with this and the amount of input data, you will need to add lots of Readers (and Writers) to your workspace.
1) Inspect Data
As usual, the first thing to do is inspect the source data. There is a lot of it and - in many cases - the required data is just one feature or one layer within a larger dataset. The final dataset we want will look something like this:

2) Create Workspace
OK. Let's get going. Start FME Workbench and choose the option to generate a workspace. We'll start with the parks data so, when prompted, enter the following choices:
| Reader Format | MapInfo TAB (MITAB) |
| Reader Dataset | C:\FMEData2017\Data\Parks\Parks.tab |
| Writer Format | Google KML |
| Writer Dataset | C:\FMEData2017\Output\Training\FundraisingWalk.kml |
3) Add Tester
The park that the walk is taking place in is called Stanley Park. Add a Tester transformer and use it to filter out any park features that are not part of Stanley Park:

Run the workspace (as you can see from above, only 1 feature passes the test) and view the output in either the FME Data Inspector or Google Earth.
4) Add Shutdown Script
The organizing team has created a share folder for materials. We could write our data to it directly, but instead let's write a the file to our system, then copy it to the centrally shared folder.
In the Navigator window locate the parameter Workspace Parameters > Scripting > Shutdown Python Script and double-click it to open an editor window. In the window enter the following code:
*NB: The code can be copied from the file: C:\FMEData2017\Resources\DesktopBasic\ComponentsExerciseScript.py*
import shutil
import os

if not os.path.exists('C:/FundraisingWalk'):
    os.makedirs('C:/FundraisingWalk')
shutil.copy2('c:/FMEData2017/Output/Training/FundraisingWalk.kml', 'C:/FundraisingWalk/FundraisingWalk.kml')
You'll notice that we're not really writing to a shared folder, just a different folder on our own system. That's OK. It's not a real project! Anyway, the workspace parameters should look like this:

5) Run Workspace
Run the workspace. You should see that the 'shared' folder is created (assuming it doesn't already exist) and the data is copied to it. This is an excellent example of the sort of thing you might do with a shutdown script.
| Aunt Interop says... |
|
If the workspace fails because of a Python error (it shouldn't, but just in case), don't worry about it. Everyone has a failure sometime. We aren't here to debug Python so just erase the script from the parameter and carry on. The important part is that you can see the type of thing a script can do and know where the parameters are to use them.
But if there was an error, it might be because you didn't write the output file with the same name or in the same directory as specified in the steps above! |
| CONGRATULATIONS |
By completing this exercise you have learned how to:
|