| Exercise 1 | Taxation Report Project |
| Data | Building Footprints (AutoCAD DWG) Zoning Data (MapInfo TAB) Tax Report (CSV (Comma Separated Value)) |
| Overall Goal | Create a taxation report for each building |
| Demonstrates | Constructing attribute values |
| Start Workspace | C:\FMEData2018\Workspaces\DesktopAdvanced\Attributes-Ex1-Begin.fmw |
| End Workspace | C:\FMEData2018\Workspaces\DesktopAdvanced\Attributes-Ex1-Complete.fmw |
The annual property tax reports are due to be calculated, and it is decided to use FME to carry out the processing. You must set up a workspace that calculates tax values for each building (based on size and zoning) and creates a text file containing the results.
1) Open Workspace
Open the workspace C:\FMEData2018\Workspaces\DesktopAdvanced\Attributes-Ex1-Begin.fmw. This is what you have created so far in order to set up readers and writers and a couple of preparatory transformations:
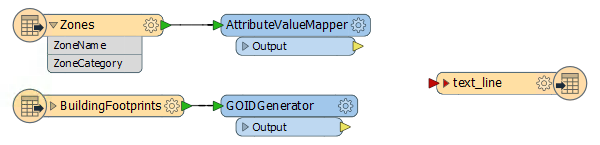
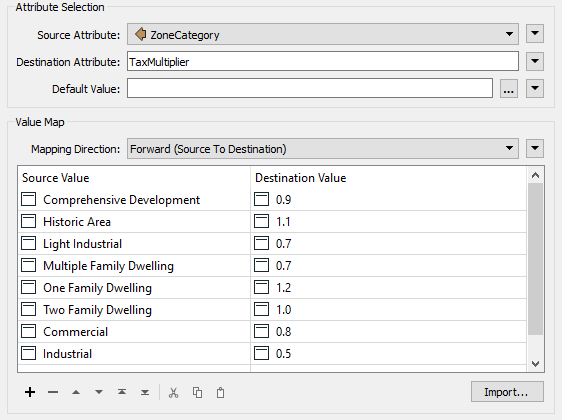
Open the parameters for each transformer in turn. Notice that the AttributeValueMapper is mapping from zone category to a TaxMultiplier value:
The GOIDGenerator is merely creating a unique ID for each building footprint.
2) Run the Workspace
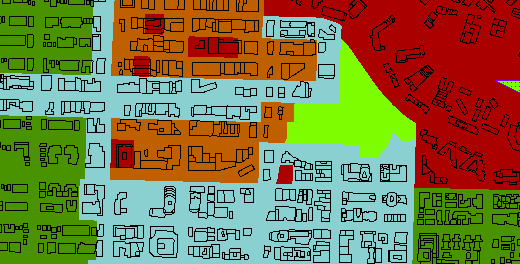
Make sure Run > Run with Caching is turned on and then run the workspace. Inspect the caches for the two source datasets. They will look like this:
Also inspect the transformer caches to ensure they are carrying out the action you expect.
3) Add SpatialFilter
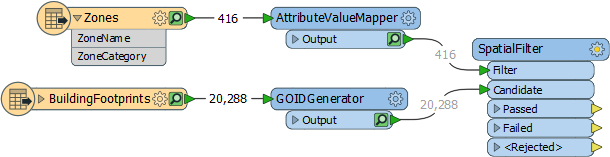
The first thing to do is transfer zoning information onto the building footprints. Add a SpatialFilter transformer to the workspace, with the zones as the Filter features and the buildings as the Candidates:
Inspect the transformer parameters. Set (or ensure are set) the following:
| Filter Type | Multiple Filters |
| Pass Criteria | Pass Against One Filter |
| Spatial Predicates to Test | "Filter Intersects Candidate" and "Filter Contains Candidate" |
You may want to rerun the workspace and inspect the SpatialFilter caches to ensure that the building features do - as expected - emerge from the SpatialFilter:Passed output port and possess three new attributes (ZoneName, ZoneCategory, and TaxMultiplier).
4) Add AttributeManager
Add an AttributeManager connected to the SpatialFilter:Passed output port and inspect its parameters.
The first task is to create a numeric value for the taxation rate.
Create a new attribute called TaxRate. Set it to a fixed value of 0.2
Next, add a new attribute called TaxAmount, click the drop-down arrow to the right and choose the option for Open Arithmetic Editor:

5) Calculate Tax Amount
The calculation for the tax amount is:
Building Footprint x Tax Multiplier x Tax Rate = Tax Amount
...where Building Footprint is the area in square meters, Tax Multiplier is the value relating to the Zone Type, and Tax Rate is a value that changes each year and so should be provided by the user.
The result should also be rounded off to two decimal places.
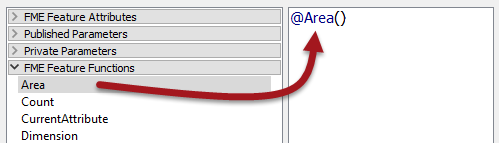
So, start out by locating Area under FME Feature Functions and double-clicking it to add the area of the building footprint to the equation:
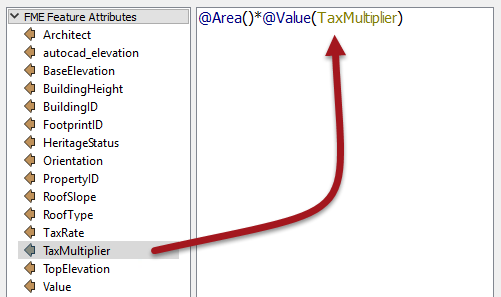
Next, add a multiplication symbol, and locate the TaxMultiplier attribute and double-click it to add it to the equation:
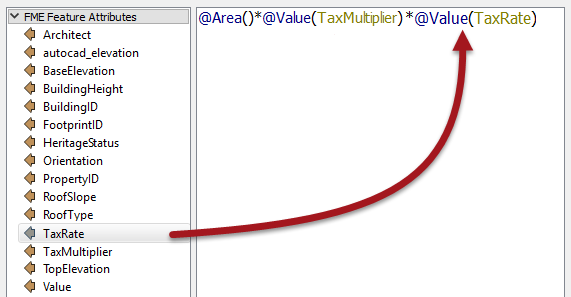
Add another multiplication symbol. Now locate the TaxRate attribute and double-click it to add it to the equation:
Now we need to round the result to two decimal places. Enclose the equation in the round function then add a comma after @Value(TaxRate) and type 2, so that we can round to two decimal places.

@round(@Area()*@Value(TaxMultiplier)*@Value(TaxRate),2)
Click OK to close this dialog, but keep the AttributeManager parameters on display...
6) Create Tax Report String
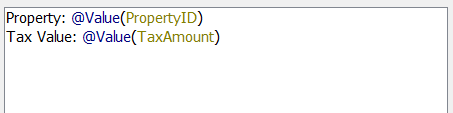
The final task is to create a string of text that we can write to a report file. In this case, the end-users of the information wish to receive a plain text file in the following structure:
Property: <PropertyID>
Tax Value: <TaxValue>
<Current Date and Time>
So, inside the AttributeManager create a new attribute called text_line_data - this matches the output schema. Then click the drop-down arrow and open the text editor dialog.
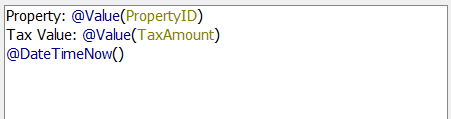
Enter fixed values and add the attributes in the appropriate places to get the correct output:
Then use the DateTimeNow() function to create a date/time stamp:
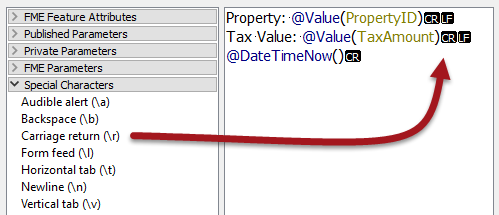
To get carriage returns in the output, we need to specifically add those characters to the editor. To see such characters, select Options > Show Spaces/Tabs
Then locate Carriage Return (\r) in the Special Characters menu and add one for each line:
Now click OK to close the dialog and then accept the changes to the AttributeManager.
7) Connect Schema, Run Workspace
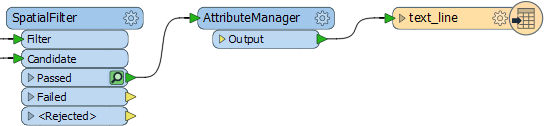
Connect the AttributeManager:Output port to the Text File writer feature type:
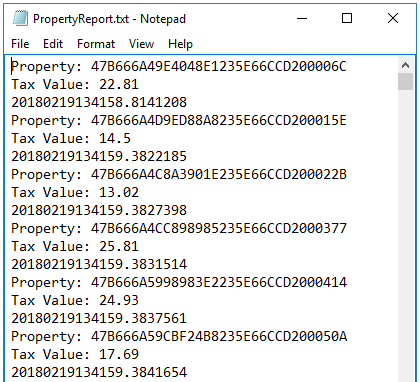
Save and then run the workspace. The result should be a text file that looks like this:
| CONGRATULATIONS |
By completing this exercise you have learned how to:
|